
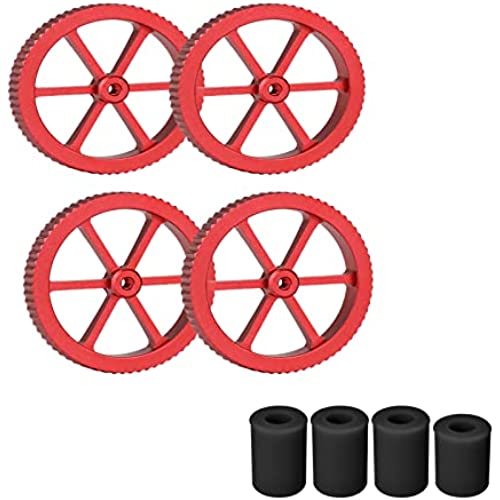
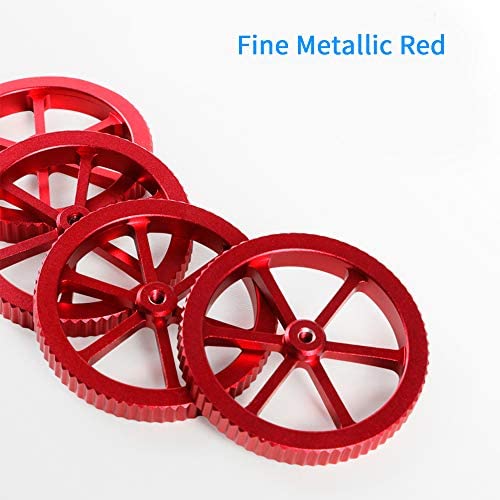

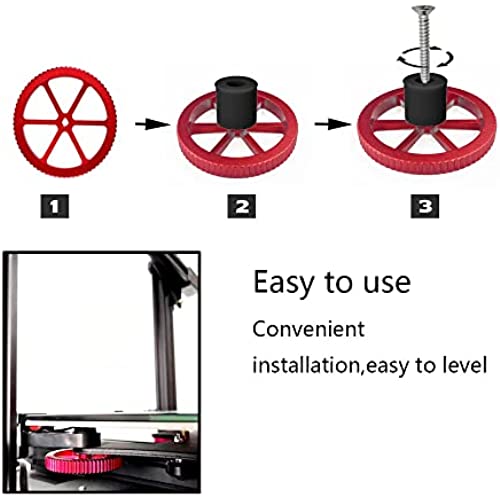
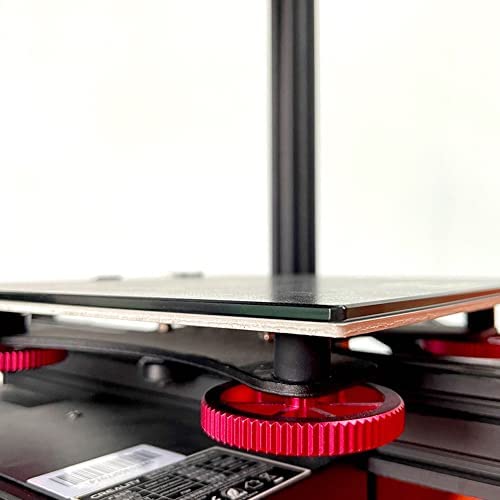


Ender 3 Springs, Creality Upgraded 4pcs Red Aluminum Hand Twist Leveling Nut & 4pcs Black Heatbed Silicone Leveling Column Mounts for Ender 3/3 Pro/3v2 3D Printer
-

ziggy
> 3 dayBe ready to adjust your z offset. You don’t want to tighten these to much cause the screws will spin.
-
Optimus prime
Greater than one weekSo I’m rewriting my review. Initially I kept my Z limit switch in the factory position, I was new to 3D printing and didn’t know much about adjusting it. After lowering my Z limit switch a few mm and tightening up the bed screws it really brought this printer to life, now I seldom level my bed, I do check it periodically but it’s never really off by enough to matter. I’ve now added these silicone mounts to 2 different printers and With some fine tuning my prints have came out amazing
-
Anthony Alioto
> 3 dayWorks with my Neptune 2S however it is meant for a ender 3 so you’re going to need to buy a matching stepper motor as the kit has to replace original. Also you’re going to need to drill directly into the frame with self tapping screws for the power supply mount, the stepper motor mount AND lead screw guide. DO NOT OVER TIGHTEN AND SNAP THE SCREWS OFF INTO YOUR FRAME LIKE ME.
-
Kevin
Greater than one weekThis is a very worthwhile modification, it made my horizontal bar rock solid. The reason I got this was because I could never get the guide wheels on my carriage tight enough to track correctly. I noticed that during bed leveling when there was a lot of movement in the z-axis that the motor side of my horizontal bar would start moving slightly before the other end. This second motor and screw set stopped this problem entirely. They also included some screw stabilizers for both sides of the printers vertical arms which was a nice touch. I did need to very slightly shim the new motor away from the vertical arm because it was binding up a little at the bottom of travel. Another reason I got this was to help support the Sprite Pro Extruder/Print head I added. Not sure if I really needed to but it made sense because of how much bigger and heavier this but of equipment was compared to the original print head the Ender 3 Pro came with. The only reason I didn’t give this a 5 was the need to cut the ends off the carriage mounting screws so it would fit my Ender 3 Pro. I thought they might consider at least putting some shorter screws in the package to eliminate this problem for the future.
-
James
> 3 dayInstalled on a Creality CR-10S. The knobs are nice and I am using them, but the silicone springs (whatever you would call them) I had to remove as they are too small. Once installed and tightened the bed is too low for you to level it with the nozzle. If you loosen the knobs to raise the bed, by the time its high enough to reach the nozzle the knobs are all loose enough to fall off and the bed wobbles. You could probably get these to work nicely by lowering the z-stop switch a bit, but I have not attempted that.
-
JVK
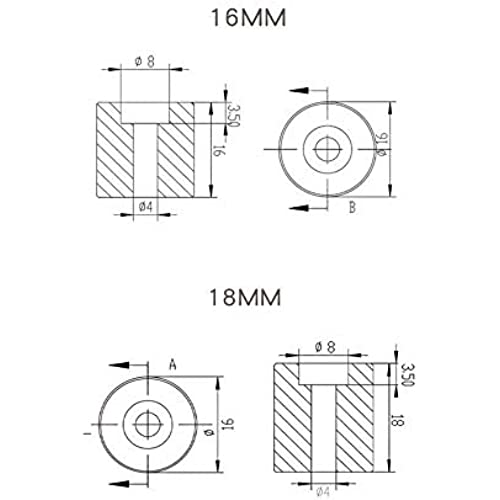
> 3 dayOn my Voxelab Aquila (Ender 3V2 clone) then stock springs are about 1.5g each, and stock knobs 12g each. The silicone spacers are 4g each, and the pretty aluminum knobs a whopping 23g each. As the Y axis is the worst place to add weight, Im using the spacers but forgoing the pretty knobs to save weight.
-
Dasingers
> 3 dayGreat quality parts with clear instructions and all of the parts you need! This made my print layers much more accurate. No more banding.
-
Mike A.
> 3 dayThe spacers fit well and work great, the knows however do not fit and are worthless they will grind the bottom of the bed when tightened , ender 3 v2 neo
-
Michael Ledford
> 3 dayThe aluminum knobs are nice, the low profile design are nice as the hug the bed a little better than the stock. The issue is the rubber stand-offs. They worked great for about 10 prints, maybe 60 hours all in of print time and they have already mushroomed which led to constant bed leveling issues. Knobs ✅ Rubber Stand-offs ❌
-
Junior
> 3 dayStraightforward to install, would recommend. Consider drilling a hole into the vertical support (left - if facing ender 3) to be able to tighten the X axis rail.
