
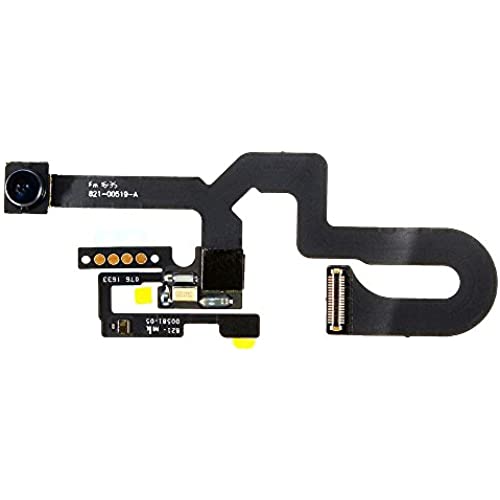
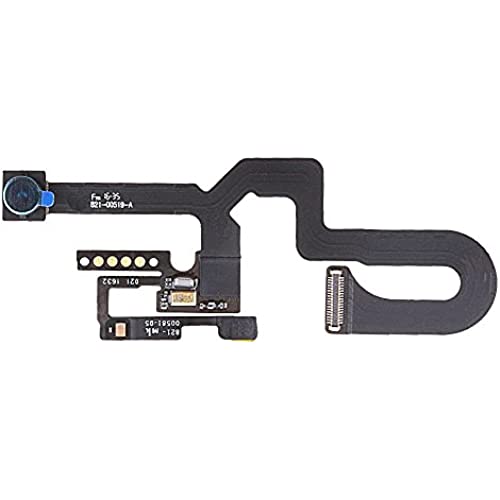
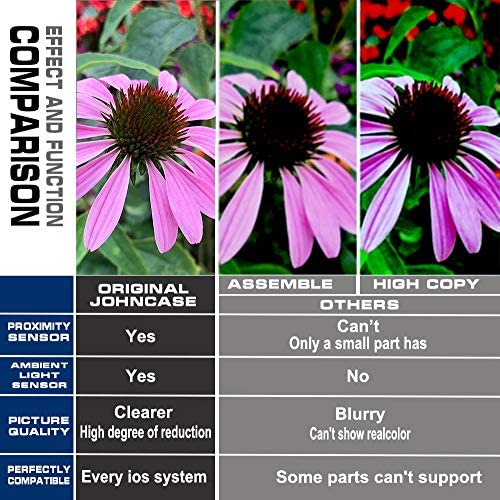
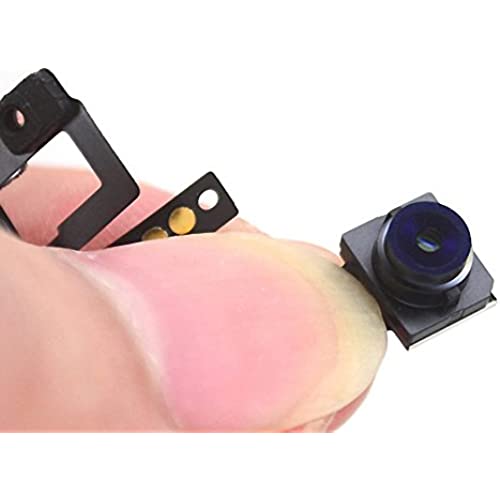
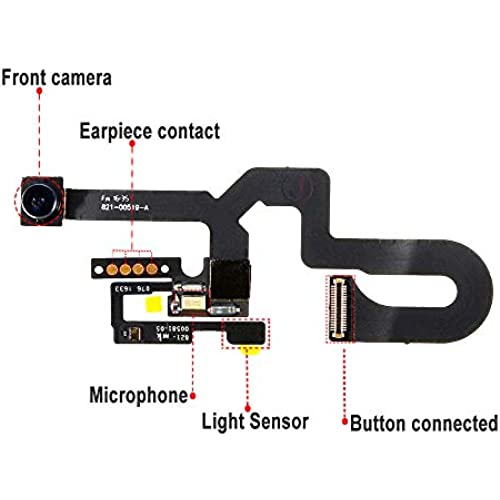
Johncase New OEM 7MP Front Facing Camera Module w/Proximity Sensor + Microphone Flex Cable Replacement Part Compatible for iPhone 7 Plus (All Carriers)

|
|
|
|
|
|---|---|---|---|
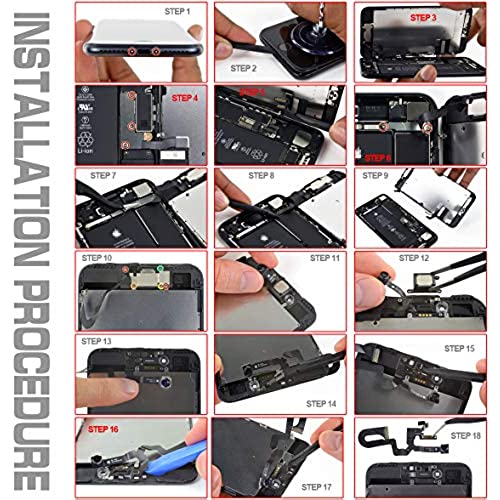
STEP 1Power off your phone. Remove the two Pentalobe screws, located at the bottom of the phone. |
STEP 2Use a Heat Gun or Hair Dryer, to apply mild heat to the lower edge of the phone about 1 minute |
STEP 31.Install the suction cup in the lower left corner of the display assembly. 2.Pull up on the suction cup with firm to create a slight gap between the front panel and rear case. 3.Insert the crowbar into the gap and twist the spudger to widen the gap. 4.Slide the spudger up the side of the phone to separate the adhesive and free the clips. |
STEP 4Open the display. because the display assembly is still connected to the case on the left side of the phone, then don"t open the display further than 90º, The Cable will break if stretched too far. |


|
|
|
|
|
|---|---|---|---|
STEP 5Remove Phillips screws securing from battery connector bracket and Removed. |
STEP 6Use the tip of the spudger to disconnect the battery connector from the logic board |
STEP 71.Disconnect the front camera flex cable. 2.Disconnect the digitizer flex cable. 3.Disconnect the display cable |
STEP 8Remove the phillips screws fixed to the front panel sensor assembly connector from the bracket and remove the bracket |


|
|
|
|
|
|---|---|---|---|
STEP 91.Disconnect the front panel sensor assembly connector from the logic board. 2.Remove the display assembly. |
STEP 101.Remove the three Phillips screws securing the earpiece bracket to the front panel. 2.Remove the earpiece speaker bracket. |
STEP 11Lift the front facing camera out of the way to access the earpiece speaker. |
STEP 12Remove the following two Phillips screws securing the earpiece speaker to the front panel. |


|
|
|
|
|
|---|---|---|---|
STEP 13Remove the earpiece speaker. |
STEP 14Use a spudger to gently pry the ambient light sensor out of its recess on the front panel. |
STEP 151.Use a spudger to gently pry the ambient light sensor out of its recess on the front panel. 2.Use the pick to lift the front camera cable up off of the two plastic posts on the front panel and separate it from the last of the adhesive. |
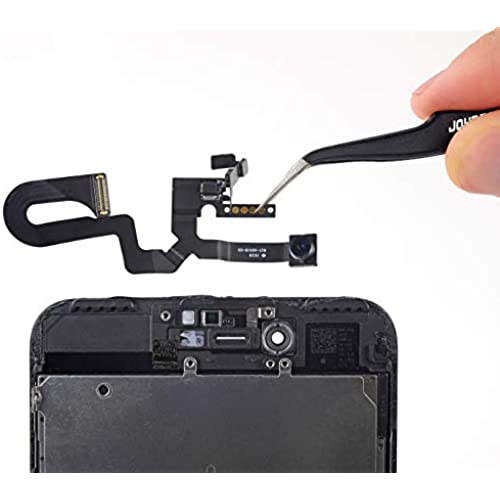
STEP 16Remove the front camera and sensor cable. |


Related products
