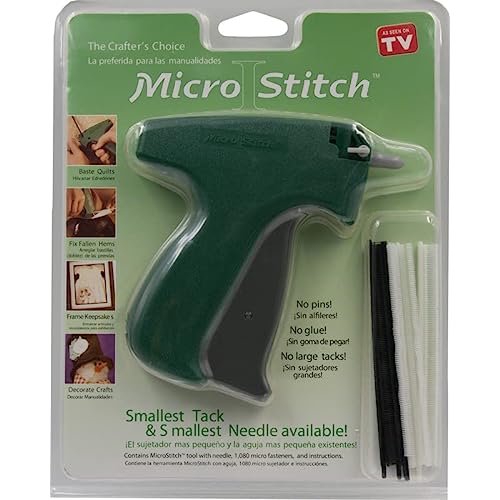
MicroStitch Tagging Gun Kit – Includes 1 Needle, 540 Black Fasteners & 540 White Fasteners (Starter Kit)

(0 Reviews)

Price
$31.75

Quantity
(10000 available )

Total Price
Share
96 Ratings
63
16
10
4
3
Reviews
  • Mrs. Vida Abshire

    > 24 hour

    Easy and it works!!!

  • Bianca Scodellaro

    > 24 hour

    This is amazing absolutely love this! At first I was tad ehh but I used it to hem my husbands pants for a wedding super fast and it was so easy to use.

  • Sara

    > 24 hour

    This thing ACTUALLY works and quick too! It’s basically a safe staple for your clothes and actually holds. Get it!

  • Alli

    > 24 hour

    Its so handy for quick fixes! Ive used it to put a few stitches in to keep sleeves cuffed, tack down some long tang top straps so it fits better, and pin a dress closed because it didnt cover the boobs well. Great product. Not perfect but it does the job. Its hard to believe they dont make/sell these anymore. The packaging is clearly old and its way overpriced now, but I scoured the internet looking for alternatives and they just dont exist.

  • jessduteau

    > 24 hour

    I can’t sew a button or pin anything. This gun has fixed most of my wardrobe. Top gaps, hem falling, straps showing this thing fixed it all!

  • Prime&Proper

    > 24 hour

    If you frequently find yourself trying to safety pin your “too low-cut for work” v-neck top or dress, then the micro stitch is for you! This purchase literally changed my life! I’ve ruined so many tops after trying to safety pin the delicate fabric and twisting the pin so it’s hidden. I’ve also run into hard times safety pinning myself into a wrap-top romper because the little snaps always fall off - it was always a nightmare trying to repin my romper after a few glasses of wine. I love this so much. I never have to worry about wardrobe malfunctions and flying safety pins anymore! It’s quick, easy to use, provides a more flexible and almost invisible hold, doesn’t damage my clothes, AND I don’t have to worry about getting poked by a rebel pin. There are only two things about this product I would change: 1. It would be nice to have clear plastic stitches, 2. I wish there were stitches that were slightly stretchy so I could get more wear out of them.

  • Bran

    > 24 hour

    My dog tears his bed up every other day and I keep tacking it back together with this. I can use this on numerous things around the house, including clothing. It is a very handy tool.

  • Amber Terrell

    > 24 hour

    So simple and quick! No need to have safety pins or even worry about sewing! Fix the issue in seconds! Also super easy to remove so the stitch is not permanent

  • Colleen Mc

    > 24 hour

    Honestly, this has been amazing. I have a bunch of dresses and tops that gape over the chest and one little stitch with this stops me from messing with my top all day.

  • Heather

    > 24 hour

    This honestly is a game changer

Microstitch tagging gun tacking tool retail fabric clothing tagsMicrostitch tagging gun tacking tool retail fabric clothing tags

The Avery Dennison MicroStitch is a complete retail package, sold with the tool, over 1,000 clip fasteners and an instruction manual. This kit supplies you with 600 white and 480 black tiny fasteners. The MicroStitch is an attaching tool that requires no pins, no glue and no large tacks. This is the crafter"s choice for basting quilts, repairing fallen hems, hemming drapes, tailoring garments, tacking appliques, assembling frame keepsakes or just decorating crafts. This hand held attaching gun is easy to use and applies a micro plastic fastener that can be sewn over. This fastening tool is also ideal for quick clothing repairs. This tool features a small, extra fine needle, a durable metal feeding mechanism and a trigger that is easy to squeeze. The MicroStitch can be used on fine fabrics and the tiny fastener can be easily removed with a quick pull or snap.

Specifications:

  • Class: Micro
  • Actuation Type: Manual
  • Loading Type: Clip

Compatible Fasteners Include:

  • 11/64" (4.4mm) White Micro Fasteners (PN: 11172-0 | ASIN: B0C3MW94J7)
  • 11/64" (4.4mm) Black Micro Fasteners (PN: 11173-0 | ASIN: B000YZCS3S)
  • 11/64" (4.4mm) Black & White Micro Fasteners (PN: 11186-0 | ASIN: B0C3MVXWG3)
  • 14/64" (5.4mm) White Micro Fasteners (PN: 11184-0)
  • 14/64" (5.4mm) Black Micro Fasteners (PN: 11185-0)

Compatible Needles Include:

  • PN: 11215-0 (1 needle in a package)
  • PN: 11041-0 (4 needles in a package)

Microstitch User Instructions

MicrostitchMicrostitch

MicrostitchMicrostitch

MicrostitchMicrostitch

MicrostitchMicrostitch

Removing the needle guard

  1. Remove protective needle guard before using.
  2. ALWAYS cover needle with guard when tool is not in use.

Loading micro fasteners

  1. Insert the long end of the round connecting bar on the micro fastener clip into the round guide slot at the top of the tool.
  2. Gently push the micro fastener clip into the guide until it “clicks” in place. Be careful not to distort the individual fasteners. The tool is ready for use.

How to remove a partially used clip

  1. Squeeze the trigger all the way.
  2. Pull the clip out of the round guide slot.
  3. Release the trigger all the way.
  4. Check the partial clip for damage before re-loading.*

*Always discard clips that have micro fasteners that are out of place, distorted or damaged. A damaged clip can cause feeding or jamming problems.

Inserting micro fasteners

Push the needle of the tool through the items to be attached.

Hold the material firmly against the front of the tool and squeeze the trigger completely.

Release the trigger.

Withdraw the needle and tool from the material.

Material is now securely attached.

Installing needles - MicrostitchInstalling needles - Microstitch

Removing needles - MicrostitchRemoving needles - Microstitch

Helpful tips - MicrostitchHelpful tips - Microstitch

Installing needles

  1. Place the needle, point end first, into the needle guard.
  2. Turn the needle lock towards the front of the tool as shown.
  3. Insert the needle with the needle slot aligned with the slot in the tool.
  4. Once in place, turn the needle lock 180° back towards the rear of the tool.

Removing Needles

  1. Place the needle, point end first, into the needle guard.
  2. Turn the needle lock towards the front of the tool as shown.
  3. Slide the needle out of the tool.

Helpful tips

  • Make sure needle is pushed all the way through fabric.
  • Keep layers smooth and flat while fastening.
  • When basting a quilt, use a basting grate or quilting hoop for fabric support to eliminate the need to put your hand under the quilt.
  • To remove the micro fasteners, use blunt-pointed scissors, cuticle clippers, or a quick pull with your fingers.

Related products

Shop
( 1318 Reviews )
Top Selling Products