
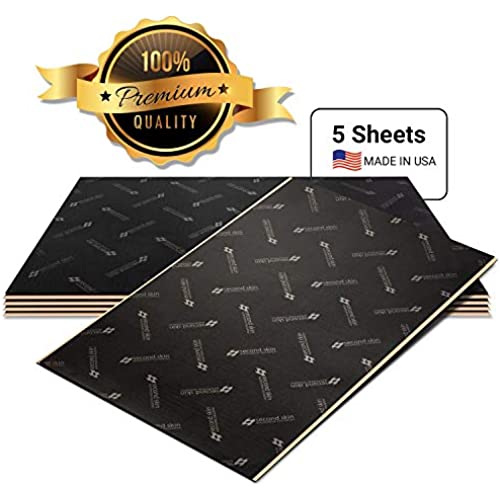

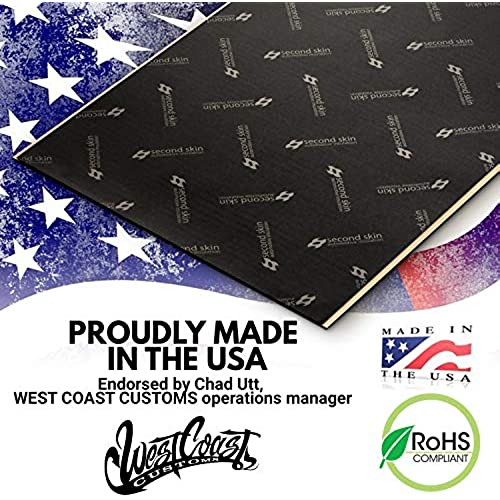

Second Skin Damplifier Premium Car Sound Deadening Material (1mm) – Butyl Rubber Auto Sound Deadener Mat (10 Sq Ft, 5 Sheets) – Made in The USA
-

Hoss
> 24 hourNice product to work with helped tremendously in my truck and my daughters car trunk
-
james d ratliff
> 24 hourvery non dirty, if you know then you know, clean
-
Marianna Schmidt
> 24 hourI used Second Skin Damplifier Premium Car Sound Deadening Material (40mil) – Butyl Rubber Auto Sound Deadener to reduce the noise coming from the rear hatchback area of my 2019 Hyundai Ioniq. When driving at 50+ mph the people in the back seat had some difficulty following the front seat conversation. After doing some research I discovered that it is not uncommon to get a rumbling noise from the trunk area of a car because manufacturers skim on sound deadening. This is the case with the rear hatch area of the Hyundai Ioniq. Apparently, one of the causes of this noise is that the metal begins to resonate at certain speeds and it can get kind of loud. Anyway, my research also led me to buy the 2nd Skin sound dampening material described above. I was very impressed with how easy this 2nd Skin product was to install in the spare tire well under the floor of the hatchback area. The material easy cut with a pair of cheesy scissors I had almost stopped using. I dry fit each piece making cuts where necessary, such as around the fitting where the spare tire is screwed down and any places that might require mechanical access in the future. I purchased one box of the 2nd Skin material and it was enough to do the entire spare tire area, but only the spare tire area. Each piece was rolled flat as directed by various Youtube videos from various installers of 2nd Skin and other sound deadening manufacturers products. It took me right at one hour to get the job done and then another 10 minutes or so to get everything picked up and put the spare tire and gear back in the car. Afterward, we went out for a drive and there was a very noticeable reduction in the noise we were hearing. The passenger was able to hear the conversation going on in the front seats without any problem. At some point in the future, I may sound deaden the inside of the right and left rear quarter panels of the hatchback. I expect that will make things even more quiet in the rear seat. Overall, I was pleasantly surprised by the quality of this product, and how easy it was to use and most important...it solved my noise problem with minimal cost and time.
-
Stanford Raynor III
> 24 hourEasy to install, just make sure you have a roller, and take your time! Product works great!
-
Wendi Neece
> 24 hourI believe this product would work great for a car but for a golf cart, I really did not notice anything different. But again I think it would really for the interior of the car
-
Justin H. Bailey
> 24 hourI wanted a sound deadener for underside of riding mower hood, I choose this because it was recommended for under hood higher temps and I wanted something with a black color which I thought would be better than a reflective color as I didnt want to reflect heat back onto the engine. I used denatured alcohol to wipe the areas clean as possible first then used some 12 aluminum foil to make a template, marked the sheets and cut them for some curved edged sections. I slit the backing at the center and peeled and folded back the middle and lined it up with center alignment marks then a small wood roller to press it down and adhere it, peeling more area of the backing in small steps and got it down well that way. Two diagonal cuts in 2 sheets made up better irregular coverage (4) pieces for the sides of the hood. I actually used the 2mm, 4 sheet kit, I bought directly from their site.
-
Nathan H
> 24 hourWorks as intended , adhesive is strong , easy to cut and shape onto surfaces . Cut the vibration down significantly in my trunk area from my subs.
-
Gray
> 24 hourInstalled in my 2004 Chevy Tahoe doors. Easy to cut and install. Quality materials made in the USA. There were no smells or misstatements about the product, A+
-
Gerardo Escobedo
> 24 hourGot here super quick. Easy to install. and my ride is so comfortable now. Will definitely do this to my other car .
-
Patrick Cameron
> 24 hourYou can tell the difference when you dont have the insulation in your trunk. Compared to when you do. Very solid material.


Stop unwanted noise with the right sound deadening materials.
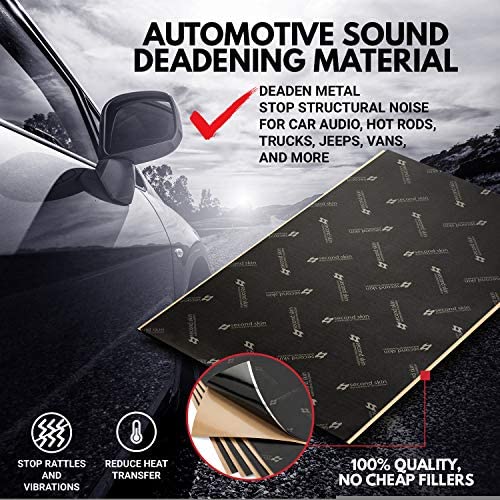
At Second Skin, we pride ourselves in offering best-in-class solutions to help you eliminate unwanted noise and soundproof your car. Everything we sell has been tested in the field and in the lab to ensure you get the best possible results. We offer a comprehensive line of the best car insulation solutions for your vehicle. Whether you have rattling metal distorting your speakers, a car restoration side-gig, or just want to create a bubble of comfort for yourself as you drive down the highway, we have the high quality materials that will get you to your destination.
Why do cars make so much noise?
Noise inside the passenger compartment of a car comes from one of three sources:
- Wind Noise: Noise that enters through gaps, holes, and open windows.
- Structural Noise: Noise that is generated by vehicle mechanical systems and travels through the vehicle structure before radiating into the passenger compartment.
- Airborne Noise: Noise that is generated by vehicle systems or an external source and enters the passenger compartment by first traveling through air, then passing through a body panel, and finally reradiating into the passenger compartment.
To fix wind noise, you need to plug the holes. To stop structure borne noise, you have to damp the metal. To eliminate airborne noise, you need to block it with a noise barrier.
Quality materials matter. You’ll only make that mistake once.
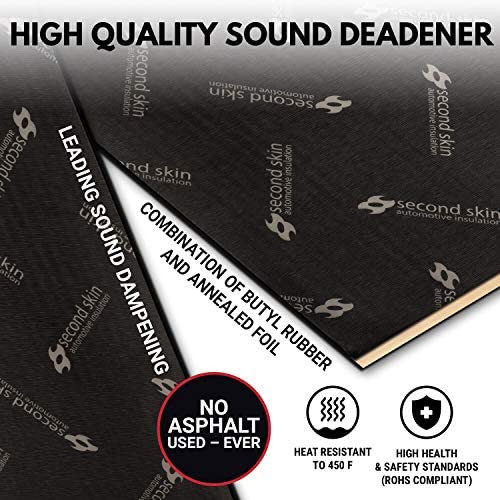
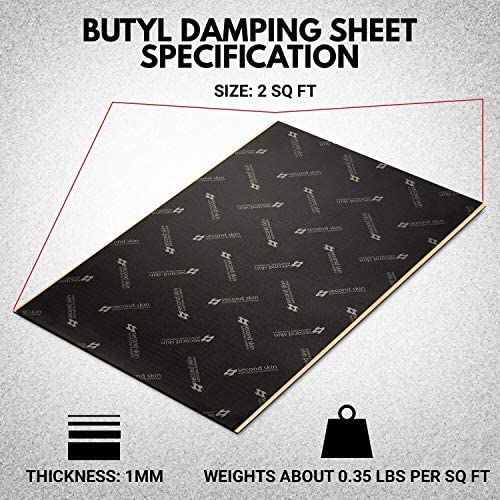
Damplifier sound deadening mats are made of 100% butyl rubber. At 40mil thick, it’s half the rubber and weight of our Damplifier Pro mats. The foil constraint layer is composed of our reinforced, annealed aluminum foil to ensure the best damping performance. The butyl adhesive is extremely strong. Once applied, the permanent bond won’t come unstuck for the rest of the life of the vehicle. Damplifier will go with your vehicle to the scrapyard.
The result is a mat that punches substantially above its weight as a sound deadener, has best-in-class temperature rating (450 F), and best-in-class customer support as we’re available to you until you complete your build and beyond.
Now… to the low-quality stuff. Do yourself a favor and avoid asphalt-based products. If they don’t talk about “butyl rubber”, it’s because they don’t have it and their lawyers won’t let them. The problems you run into with asphalt is threefold:
- It stinks. If you open the box and it smells bad, take it back ASAP. It’s only going to get worse when you’re in your car on a hot summer day.
- It melts. We have dozens of examples where we helped a customer remove low quality asphalt from their car. It takes hours of work, and isn’t particularly fun.
- It outgasses chemicals. When you heat up asphalt, the fumes it releases are toxic to you, causing headaches, coughs, and worse (look it up). It’s not on the level of lead paint or asbestos, but why would you put it into your car?
|
|
|
|
|
|---|---|---|---|
Vibration Damper
|
Thermal Insulation
|
Reduce Road Noise
|
OEM Approved
|


How to Install Sound Deadening
|
|
|
|
|
|---|---|---|---|
DecideDecide what parts of the car you want to insulate first: roof, floor, doors, trunk, firewall, or hood. Insulating each part of the vehicle has its benefits. You likely need to do a little detective work to identify the noisiest parts of your car or truck. For the best results, you’ll need to soundproof all of your vehicle’s metal surfaces. Before installing any material though, step #1 is always to expose the sheet metal. For any metal surfaces behind plastic panels or upholstery, you’ll need to research how to remove them. Be careful to avoid breaking plastic trim parts or any fasteners. Detailed step-by-step guides can be found on our website or the one of the many automotive forums. |
RemoveRemove any damaged factory insulation after you’ve dismantled the interior. If the insulation is in good shape, you can choose to leave it and save yourself the trouble. Ensure all debris, rust, and waxy oils are removed from the application surface. Clean the surface with denatured alcohol and a dry, clean rag. We do not recommend using a solvent or degreaser, as they can leave behind a film that will prevent the best bond from forming. Allow the metal to dry. |
MeasureMeasure the cleaned surface where you want to apply your sound deadener. We recommend to start by making a pattern of an appropriate size on paper or cardboard and then transfer that to the sound deadening sheet. Taking the time to measure will give you a cleaner install and avoid wasting material. Use a sharp utility knife to trim the mat to the appropriate size. Our annealed foil constraint layer is sturdy, so we do not recommend scissors. Be careful and wear gloves. The foil edges are sharp. |
InstallHold the mat up to the metal surface of the vehicle where you’ll be applying it. Make sure you like the coverage before removing the wax paper and exposing the tacky butyl adhesive. For larger sheets, it can be easier to gradually remove the paper backing and slowly work your way across the panel. Use your hands to flatten the sheet and adhere it to the metal surface before rolling out any air pockets with a wooden hand roller. Pop any stubborn air bubbles with a pin. After you’ve smoothed out the butyl sheet with the roller, you’ve created a permanent bond that’ll stay stuck even under extreme conditions. |


Fully Soundproof Your Car
|
|
|
|
|---|---|---|
Sound DeadeningSound deadening is the hidden secret behind the upholstery of any car project. To reduce road noise, use Damplifier to stop the structural noise generated by vibrating metal. Stop the vibrations, stop the noise. |
Sound BlockingAfter you’ve damped the structural noise, stop airborne noise with a sound blocking layer covering the entire floor and inside the doors. Luxury Liner Pro has a high r-value and STC rating, making it an ideal insulating noise barrier for engine, exhaust, and road noise. |
Sound AbsorptionFurther quiet things down inside your vehicle with sound absorption materials. Mega Zorbe has a high r-value, making it excellent for the car roof, and a high sound absorption coefficient to reduce interior echoes and improve acoustics in door cavities. |


