
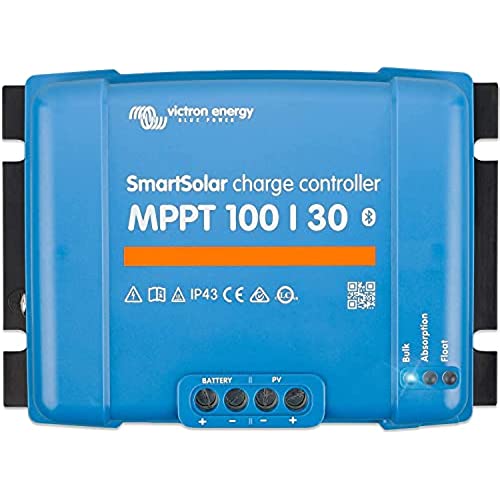
Victron Energy SmartSolar MPPT 100V 30 amp 12/24-Volt Solar Charge Controller (Bluetooth)
-

MacGyver Jr.
> 24 hourUsing this to charge up a battery bank. The bluetooth connectivity range is a little on the weak side. I have had to exchange this unit several times for that fact, however, as a charge controller it performs very well. There are a lot of cool logging features and it is very customizable to your specific battery chemistry. The unit does run a little warm when panels are at peak production, but quite impressive being one of the few units that is this compact and doesnt rely on a very loud fan for cooling.
-
A Miller
> 24 hourWish it came with an included readout giving battery state of charge etc.
-
Axel_Iceland
> 24 hourSolid quality.
-
John Hunt
> 24 hourSo far working fine on my 480 watt 48 volt panel
-
Kamron Altenwerth
> 24 hourLiked this controller from the moment I took it out of the box. Has a good solid feel and looks like its quality built. Installed it near my battery bank and close to my BMV 712 battery monitor. Once hooked up firmware updates took over but once finished I was surprised at how well the controller and monitor shared information. If battery monitor has temp sensor battery charge rate is temp compensated using the shared data I am using a 160 wat portable unit so I had to maximize power harvest as much as possible. Cut the supplied, cheap, PWM controller out of the circuit then wired panels in series. Feeding over 43 volts into this controller and am charging with 90% of the panel capacity with just morning sun that hasnt reached optimum height/angle. Well worth the price and the BT connectivity is priceless. A perfect mate to a BMV 712 battery monitor. I bought the 15 amp model even though the max output of my panels in series is less than 4 amps. For the slight difference in price over the 10 amp model I now have room for a larger PV array if I ever choose to upgrade.
-
Sarah
> 24 hourIm no electrician, so I didnt know this had to be programmed. I thought I could just connect my solar panels and battery to the controller and it would do the rest. It worked fine like that for two months, then my batteries dropped to 0% with no real reason. Its still a mystery! You have to install the app for the device and input the battery settings via bluetooth. Theres no other way to do it. But after that, its been working great with my setup.
-
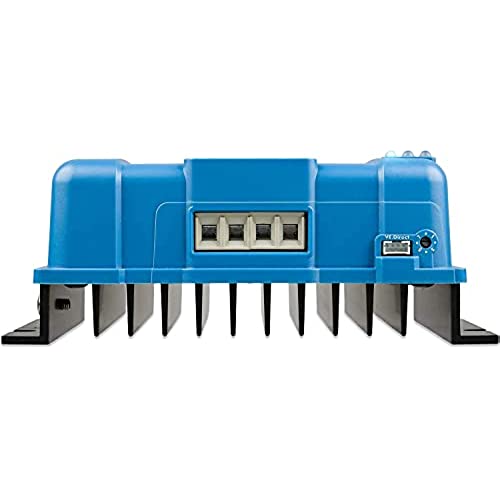
Sourdo
> 24 hourI recently installed two 100 watt Renogy solar panels on top of my RV trailer, along with a Renogy 30 amp PWM controller with a bluetooth dongle. The panels work fine, the Renogy SCC (Solar Charge Controller) not so fine. The bluetooth app is broken, crashes frequently, and is mostly a waste of money. While the Renogy SCC did its job, the performance on cloudy/shaded days was inadequate. With a PWM SCC, you must run your panels in parallel. You cannot fully charge a battery with 13 volts available (cloudy day in trees) from the PWM SCC, no matter what the amps is. With the panels in series, that 13 volts would now be 26 volts. So I ordered the Victron SmartSolar 75/15 MPPT controller with built in Bluetooth. With an MPPT controller, you have the option to run your panels in series or parallel. Running my panels in series doubles available voltage (up to around 40 volts, which the SCC converts excess voltage to the appropriate voltage (12 or 24 volts) and current (amps) to charge your batteries. This SCC handles this nicely. The unit was delivered in brand new condition. I was surprised how small it is. There are three LED indicator lights on the front. You cannot flush mount this device. I installed this inside a wall with a vent pipe, and ran my wires out the top of the RV via the vent exit. Where I mounted inside the wall, I used a tin lid against the wood. The instructions say to mount the unit on a non-combustible surface. I stacked two washers between the wall and tin, offering a better way to dissipate heat from the back of the device. If you look closely at the picture, you can see what I did. Then I made a facade cover with a small peep hole to quick view the LEDs. These LEDs are quite bright, some people tape over them. I would try a black felt tip marker to try and dim things first. There is no way to flush mount this unit. You cannot use wire bigger than 10 AWG. Some claim 10 AWG is too big, but that just isnt so. Just dont mangle the wire ends and theyll fit. But there is a better way, read below. What I do is to tin the wire ends. Strip off 1/2 inch of wire, give a slight twist to keep the strands tight. With a good soldering iron, solder the wire end, making sure the solder flows evenly. Not too much or youll end up with a fat end that wont fit in the lugs. You might practice this with a piece of wire, but once done correctly you have a superior connection. Then after inserting the end into the lug, tighten snuggly, then loosen, the re-tighten. Each time the lug will screw down a little tighter as the lug worms into the wire end. Ill do this at least 10-15 times, until the lug is snug and secure. Be careful to not over tighten and strip the lug. Use cable restraints. Once the battery is connected, hook up the PV array. I cover my solar panels with some plywood (or some cardboard) to turn down the open voltages while I connected those, which for two 100 watt panels in series is over 40 volts in bright sun and could shock you. I also installed a disconnect switch for the PV panels, next to that is the inverter remote switch. Your battery must be connected first, then connect the PV array. The one weak area of this device is the manual. It comes with a tiny booklet that is difficult to read. You can download the PDF version from Victrons website. Some of the info is sketchy and in not so plain English. For some info you need to install another app called Victron Toolkit. This offers explanations of the various blinking LED functions. The built in Bluetooth requires an app called Victron Connect(I have an Android Nokia smartphone) for reading power outputs, managing battery charging profiles, etc. The app was downloaded and installed without issue. With the app installed and paired to my phone, the app quickly upgraded the firmware for the SCC. Once this was done, the app works very well. I can walk about 40 feet away and can still stay connected, which is about normal for Bluetooth devices. Again, the app is well done and works well. The manual has some odd English to explain some of the functions. Ill try to explain in plain English as I see it. When you first hook up the SCC, the manual says 5+ volts from the PV panels over the Battery volts is needed to be operational (According to the manual). I would expect the unit to be operational when I bought it brand new out of the box. What this really means is this; When the controller sees 5 or more volts from the PV (solar panels) above the battery volts, it turns on the charger. When the PV volts drops to 1 volt or less then the battery volts, it turns off the charger. You can tell if the SCC is on and charging with a steady blue(or yellow or green, depending on SOC(State Of Charge)) LED, or off with a blinking blue LED every 2-3 seconds. When not charging, you can still use the Bluetooth. As the day progresses the LEDs will turn to yellow (absorption mode) to green (float mode) depending on clouds and trees, and of course electrical use. With my panels hooked up in series, mine starts up right about the crack of dawn and is charging in bulk mode with a steady blue LED. With the ability to turn off charging, I have notice right off my battery is still > 80% SOC (state of charge) when it restarts in the morning, even with the propane sensor on (my only parasitic load when parked). I like the Bluetooth app. It gives you complete control over battery settings and you can use just about any type of battery including lithium. The app also has a handy history function that is very useful. Some people complain about the range of communication with the Bluetooth. Mine functions like any Bluetooth, about 40 feet of range and that is that. Even with the SCC inside a tin covered RV and me outside, it works fine. I hope someone reads this before going with a PWM charger. For a few more bucks you can have a superior solar system. But for the somewhat lacking manual, I have no cons for this device. I have also ordered the Bluetooth battery temperature and voltage monitoring device for better charging. My batteries are outside the RV while the SCC is inside, this can skew charging parameters. https://www.amazon.com/gp/product/B07RTYGMBD/ref=ppx_yo_dt_b_asin_title_o01_s00?ie=UTF8&psc=1 I use two Duracell 78 ah AGM Ultra group 24 batteries along with a 1200/2400 watt inverter, so far this is working out well. This device has load outputs. For the average RV person setting up a simple solar system, this can be ignored. Run your 12 volts supply from the battery as it was originally wired. UPDATE July 1st, 2021: I have recently added two more Renogy 100 watt compact solar panes to the other two, making a total of four. To get these to work on the Victron 75/15 Smartsolar charger, I created two groups of two panels in series, then connected the two groups in parallel. Any other way would be over the rated amps or volts (depending on how the panels are connected. This setup delivers to the battery 15 amps @ 13.6 volts (float), which is as high as it can go. Volts remain the same as the original setup with two panels in series, about 43 volts. I just get double the amps. If I want to get the maximum amps I need to buy the next size up, the MPPT 100/20 controller. As it is now with four 100 watt panels, the charge controller works very well. With 4 panels connected, it turns on quite a bit before sunrise. The extra panels are very helpful in shade or cloudy days(or both). And when the sun shines, the output is strong.
-
Tyson Moore
> 24 hourThe Victron 100 20 MPPT controller delivers peformance as effortlessly and efficiently as it delivers energy. This unit was connected to two 105 A-hr lead acid deep cycle batteries for storage, two 120 W Photovoltaic panels for energy capture, powering a load composed of a Dometic 95DZ dual zone fridge freezer. For the test a grocery load was simulated with two 1 gallon jugs of tap water and two ice cube trays of water to make ice. The test was begun late in afternoon on Saturday and concluded early evening on Sunday. The Victron supplied energy throughout the entire process and smoothley and effortlessly transitioned from solar power to battery. As the sun came up I was able to monitor panel voltage in real time, and began to see it slowly offset battery power, until the batteries began to charge and all power for the Dometic was supplied by panels. The test was a complete success and demonstrated to me the need to expand the system by one battery and one pannel to 345 A-hr, and 360 W solar. The Victron did extremely well and was only slightly warm at highest load condition. Thank you!
-
Coastside Kirk
> 24 hourIn a side-by-side comparison between this Victron unit and an HQST solar controller it’s impossible to tell any difference in battery charge current. The Bluetooth communication for setup and monitoring is easy and convenient, except for the occasional dropouts. If you really don’t need the 48 volt capability I recommend saving some money and use the other brands. I intend to run a 48 volt battery system but set up a 24 battery bank for comparison of the Victron and HQST (which is a 24 volt maximum). Each controller was connected to identical 400 watt PV arrays and battery charge current was measured by watt-hr meters. After accumulating 500 watt-hrs the arrays were swapped and test repeated. The results showed no meaningful differences in charge delivered to the battery bank. The solar climate was a mix of sun and clouds during the test. Visual snapshots of both meters during the test reinforced that both controllers were responding similarly throughout the variation in cloud cover.
-
aTypicalEngineer808
> 24 hourSummary: I have evaluated quite a few MPPT controllers for Vine, and while all were decent, the Victron Energy (VE) has high ratings, so I decided to purchase one for evaluation. My solar/PV system specs: 1000W of panels; 24-volt, 270Ah marine battery bank (Optima); Voltworks 2000W inverter. Using the system to reduce our electricity bill. Observations: The first thing to notice is that this one, unlike most others, does not have a control panel (just three LEDs); which means youll need a smart device to read the values. There are two basic VE offerings: this SmartSolar (built-in bluetooth), and BlueSolar (requires a BT dongle). Between the two, I went with the built-in BT (SmartSolar). One great feature of the VE system, is that it allows the MPPTs to communicate with each other via BT; which is a great feature for a larger system. Recommendations: One reason to choose the lower cost BlueSolar over the SmartSolar, is if you do not need the additional features that the BT brings; but for me, I didnt mind spending the extra $30-40 (per controller) to gain those features. Pros: Industrial quality & features; good application support (firmware updated upon first connect); security (bluetooth); good/efficient charging algorithm; good data and graphs. Cons: No built-in display (offset by the much better app and graphs). Conclusion: At $160, rating this 5-stars. Of all the MPPT controllers I have reviewed, this is the recommended one. Related Products (lised in ORDER of HIGH to LOW rating): EPEVER MPPT Solar Charge Controller 10A 60V PV 1206N ~ $60 (5-star) https://www.amazon.com/gp/product/B094JCG6Y1 ACOPOWER Midas 40A MPPT ~ $180 (4-star) https://www.amazon.com/gp/product/B08HQB8RYK ACOPOWER MPPT Solar Charge Controller 30A ~ $140 (4-star) https://www.amazon.com/gp/product/B01NB1KOOZ Renogy Rover 20/30/40 Amp ~ $112/170/168 (2-star) https://www.amazon.com/gp/product/B01MRWTAB5 GARNDE Rosefinch XS 30A MPPT ~ $150 (1-star) https://www.amazon.com/gp/product/B094Z7RVXR


