
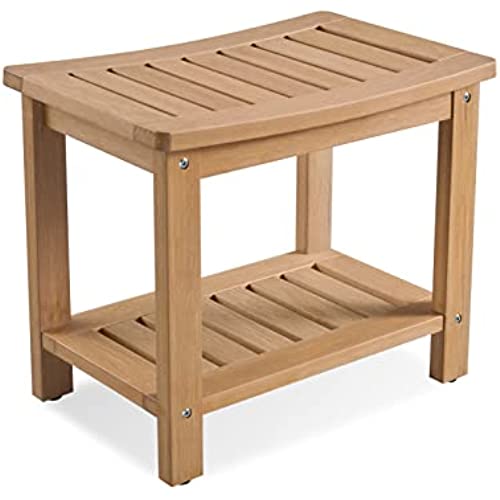
Poly Lumber Shower Bench, Shower Stool with Storage Shelf, Water Resistant & Non-Slip Design Shower Seat for Bathroom, Living Room, Bedroom 21 1/4×14×18 1/2(Teak Color)
-

Karla Cerrillo
> 3 dayEasy and quick to put together. Very sturdy. Excited to use without it getting moldy like other wooden shower benches.
-
Paul Brinkmann
> 3 dayMy wife and I wanted something sturdy and yet something that looked good and low maintenance. This worked out great and looks great in the shower
-
C.J.
> 3 dayIf you have a home with only a shower, buy this. Its comfortable, sturdy, and wont rot. Also, it looks really good. Money well spent.
-
Kainoa68
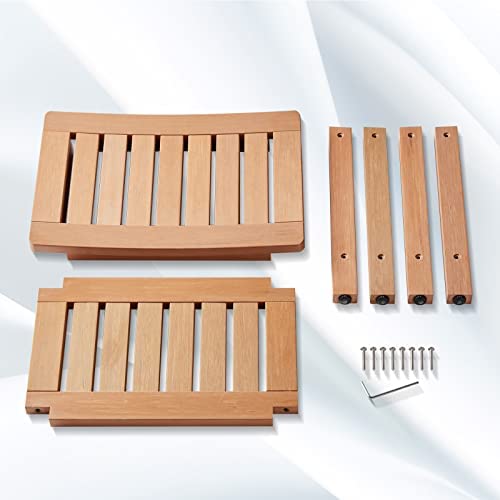
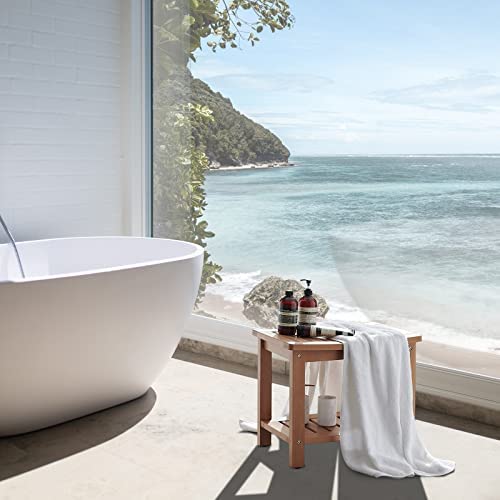
> 3 dayGot this because one of my showers doesnt have a built in bench or ledge. This bench attracted me because it had that typical spa bench look, but also wasnt made of wood since it is going to always be in a wet and humid area. Material: The manufacturer says the bench is made of polystyrene. I know, you are thinking isnt that the stuff that foam cups are made of? It that cant be very sturdy. Well, I can tell you that this is not the foam version. It is dense, heavy and feels very durable. It is molded in a unfinished teak color. All surfaces have a wood grain with texturing that simulates real wood. To me, unless you inspecting it really close, you wouldnt be able to tell it isnt real wood. Design: As mentioned earlier, the design of this product has that spa bench styling and design that is recognizable everywhere from bath stores, lifestyle magazines, spas and hotels. The top of the bench is curved to provide a comfortable seat or place to rest your leg if you have to shave or wash your legs and feet. The lower shelf is flat for holding items. Both surfaces are slatted to allow water to drain and also to mimic the design of the teak wood products. Assembly: Putting it together is straight forward - Attach the legs to the seat and shelf using the eight bolts. They are Allen head bolts, but an Allen wrench is included. Put on the non-slip feet on the bottom of the legs and your done. Once all the bolts are tightened, I found the bench to be even at all four corners, also when leaning or sitting on it, there wasnt any flexing or wobbling. Evaluation: For the price you could find a teak or wood bench that is similar, but before you do, I would recommend that you considering where and how you will use your bench and also do you want to maintain it. As mentioned before, my intended purpose is to use it in a shower where it will constantly get wet. Since this bench is essentially plastic, no maintenance is required. However, like other types of wood, teak needs to be treated with a stain or oil from time to time to keep it looking good and prevent it from developing mold, etc. Summary: The Psilvam bench is a high quality product that has met our expectations. Thumbs up!


Psilvam Shower Seat
Just like real wood
Psilvam high-quality shower bench adopt unique wood-like color technology, we abandon the exaggerated wood grain of traditional poly lumber, just to show the most real and pure wood texture
Low maintenance
This shower seat does not require any special maintenance. Generally, you only need to wipe it with soapy water.
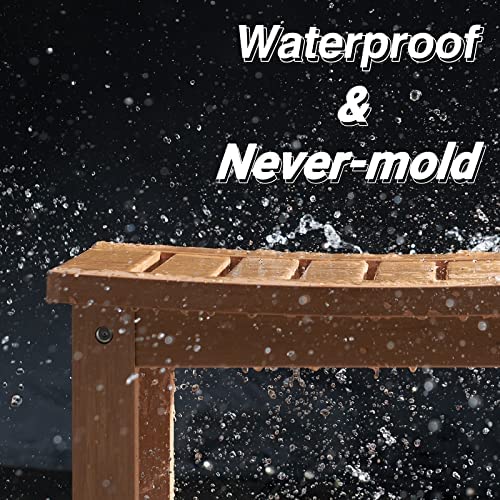
Never Fades
The color of the shower shelf is the color of its material, no paint is used. Therefore, the seat does not contain harmful substances such as methane and will never fade.
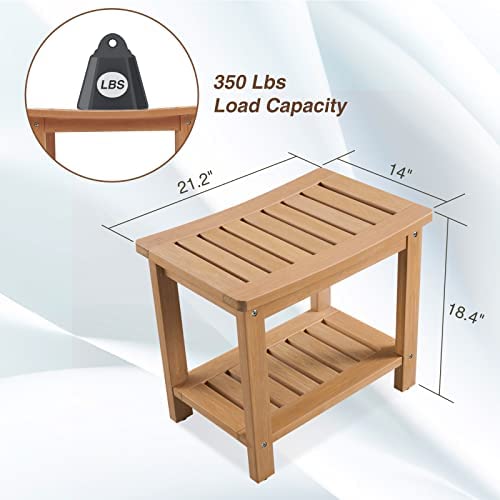
Specific parameters
- Material: Polystyrene
- Size:21 1/4"×14"×18 1/2"
- Item Weight:16 Pounds
- Max support:350 Pounds
- Use period:20 years +
|
|
|
|
|---|---|---|
Smooth Edge & ErgonomicsRound corner and well-sanded edges for safer use, Cambered seat provide a comfortable sitting experience |
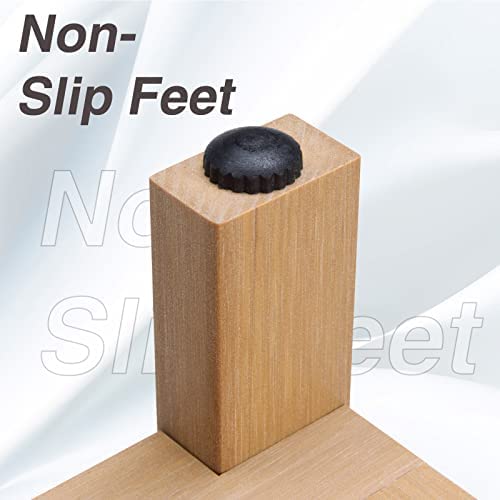
Non-slip feet4 Slip-resistant plastic feet prevent the shower bench from slipping away. Improve traction and stability for extra safety. |
Water ResistanceThis shower bench made in this way is strong and durable, has strong waterproof performance can withstand all kinds of weather, and will not chip, crack, peel or rot |


