


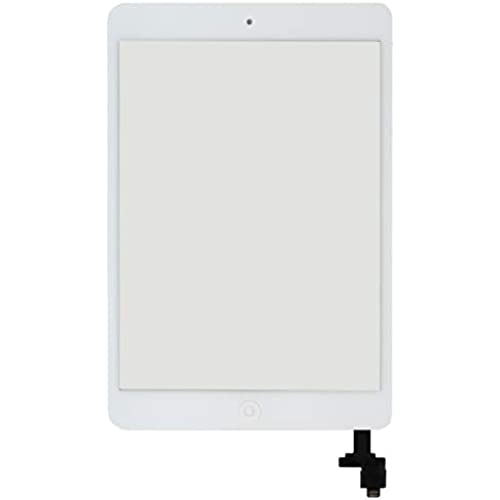

Fixcracked Touch Screen Replacement Parts Digitizer Glass Assembly for Ipad mini 2012 (A1432 A1454 A1455)& mini 2 2013 (A1489 A1490 A1491) 9.7 inch+ Professional Tool Kit (white)
-

Gundamman
> 24 hourThis was relatively easy to install, all things equal. Android tablets seem to have the most simple way to change a screen, and Apple seems to like to make things difficult. You cannot fault the manufacturer of the screen, but Apple. It took me about 40 mins all told to heat up and remove old screen, get the everything apart to remove all of old screen connections, and then re-install new screen. It went right in and was done with no muss or fuss. Did have some screws strip out, but that is again an Apple issue, they want you to shell out the money for them to fix it. To help improve adhesion, I heated up the screen and thus the adhesive before putting it in. Just hit it with heat gun for a minute or so and stuck it on. Almost a month later and the screen is still holding in place. Worth the price.
-
Andrew P.K.
> 24 hourThe instructions say you may use a hair dryer but it doesn’t get hot enough to soften the adhesive. So if you can use a heat gun, do so. My screen was totally smash so the suction cup didn’t help much. For that to work it needs a preferably uncracked part of the screen. Otherwise, use the nice selection of tools provided Ed to dig it out. All in all you have to have a half a brain to complete this repair. I wore latex gloves to protect from shards of glass. Also use containers such as an egg carton when you remove the screws and label where they go. The only disappointment which is one of the most important things is the adhesive. After you transfer the magnets and pull your adhesive protectors off you would think it should be set it and forget it. I tried weighing it down over night and the glass still is popping up. Everything works fine but the original glass has much more adhesive to hold the glass in place.
-
TechMan
> 24 hourIt lasted little over one year, then it started acting up, either not responsive or clicking random spots as if one touched the screen when not. 3 stars for lasting one year for the price.
-
ysmith
> 24 hourI was skeptical reading the negative reviews but the install was not all that difficult. You have to be very patient and delicate with the process. I used a hairdryer and a microfiber cloth of my own and the rest of the tools came with the screen replacement. I also used a YouTube video over the written instructions it came with. Install took about 30-40min, I think next time it will take half the time. For $20 my iPad is useful again!! I did not have the adhesive issue on the screen previous reviewers had...maybe they fixed this?
-
Roger Taylor
> 24 hourDid not come with adhesive tape as exprcted
-
Rebekah Turner
> 24 hourComplete kit with video link that made it so easy to remove the broken screen and put in the new. No issues at all with installation or screen interaction
-
Miss Alysa Heaney Sr.
> 24 hourThis is the second time I have fixed a cracked iPad mini screen so I am somewhat familiar with the process. I ordered the first replacement kit to fix my mothers iPad mini from the same seller and I was extremely satisfied with every aspect of the product. So when I needed a replacement screen for my personal iPad mini, I came straight to this seller. Same product, same results, and one very happy customer! One piece of advice I can offer: While the kit does include a template with step-by-step instructions, I found it much easier to follow along using one of the many youtube videos online. The process is not very difficult so long as you are PATIENT!
-
Colleen
> 24 hourThis is a GREAT kit. The adhesive is not super strong but I have never ordered a kit that had adhesive as strong as the original, I get around it by using a case and have no problems. I installed this kit according to a you tube video and the first time it took me FOREVER. Easily an hour. I got the whole thing disassembled, replaced, reassembled, and the screen wouldnt come on. You have to unplug the LCD screen to get to the glass screens connector. So I took it back apart to see if the connection was secure, it was, unfortunately, put it back together, nothing. Set it aside and a few months later, started searching on replacement LCD screens, thinking I had fried it.I found one that had a comment unplug battery if LCD isnt recognized, it will force the ipad to recognize the new LCD screen. So I took it back apart (now Ive got it down to about 10 minutes. :) ) and just popped out the battery connector and plugged it back in and the darn thing started right up. I had forgotten to turn off the ipad before I started, maybe if I would have remembered that step, I wouldnt have had to unhook the battery...
-
Victor
> 24 hourLove the product 3 rd time using it
-
Phillip M Forde
> 24 hourI really would have preferred to contact Fix Cracked directly but I couldnt find any means of doing that except by filing a complaint. I ordered a total of 4 iPad Mini digitizers, the last two were ordered in December so they are past the return date.I had to replace a customers digitizer because of phantom key presses so I used the fourth one today. I taped up the flex cable and the contacts at the bottom of the digitizer with Kapton. The ghosting appears to have stopped but on removing the front protective film there is an almost impossible to remove film of adhesive or fused plastic on the screen. Attempts to remove it just makes it appear worse. It may come off by rubbing just with my fingers but I think I made that even harder to do by using the solvents. Yes I went ahead and ordered two more because they function well as far as can tell but I want the manufacturer to be aware of this film left after the removal of the front protective film.


