
Litcher Globe String Light Suspension Kit, Outdoor Light Guide Wire, Vinyl Coated Stainless Steel Steel Cable,Include 150fts Transparent PVC and 304 Stainless Steel Wire Cable, Turnbuckle and Hooks
-

Jason
> 24 hourEasy to install! Has everything you need to hang outdoor lights! Great heavy duty quality and love its stainless steel.
-
Ryan c mitchell
> 24 hourGreat quality, simple and sturdy installation, I hung my lights just the way I wanted to, with great support..the only thing I needed extra was black zipties to attach the light strands to the cables. Still very happy
-
Edgardo Schmeler
> 24 hourCame with everything I needed. Lots of fasteners.
-
Robert T.
> 24 hourAbsolute garbage. Don’t waste your money, coated wire broke one week after installation.
-
Rex
> 24 hourI hung string lights in my backyard with this wire but it snapped after being up for just a year. I would have expected it to be more durable.
-
AMY S
> 24 hourKit had everything you need and more. Extra hardware for at least one more project. Included instructions. Much cheaper than buying all parts individually too.
-
jeff alexander
> 24 hourI used this wire kit to hang outdoor lights. I thought the price was a little high till I received the kit. Its better quality and way heavier wire than I expected. Plastic coated too. You could hang a lot more weight from it than I did.
-
Jeff
> 24 hourDosent hold up at all
-
Philip F Minalga
> 24 hourMade my job easy. Great value with components!
-
Mr. Diamond Toy
> 24 hourLoved it. All the parts included. The wire is rubber coated. Will buy more. The only thing is that it should come with black tie straps


Brand Story
Litcher brand was founded in 1994 in Zhejiang, China
Our string light hanging kit was officially sold online in 2018. We constantly update our products all the way. We strive for excellence in hardware
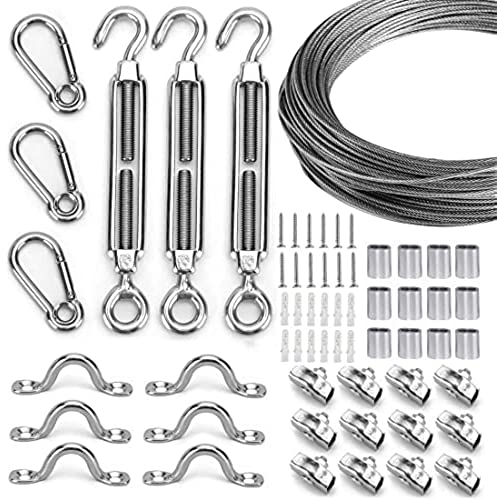
Product Spec:
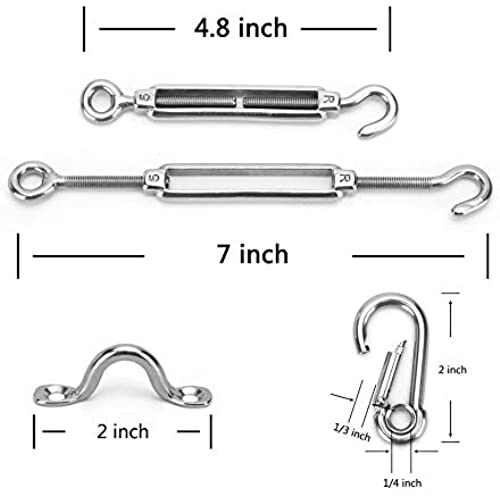
Turnbuckle: 3 Pcs (304 Stainless Steel,M5)
Snap Hook : 3 Pcs (304 Stainless Steel,M5)
Hump Screws : 6 Pcs (304 Stainless Steel,M5)
Rope Clamp: 12 Pcs (304 Stainless Steel,M5)

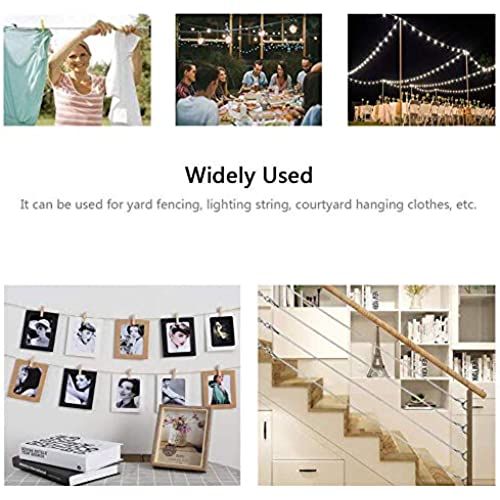
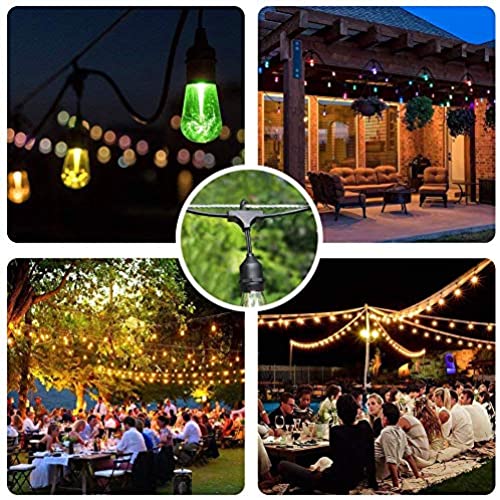
The most beautiful scenery is what you create for the people you love most
Waterproof strand for patio,garden,porch,Backyard Party Hanging Light.Outdoor and indoor suspension for lamps, clothes, Sun Shade Sails and Sundries others.
|
|
|
|
|
|---|---|---|---|
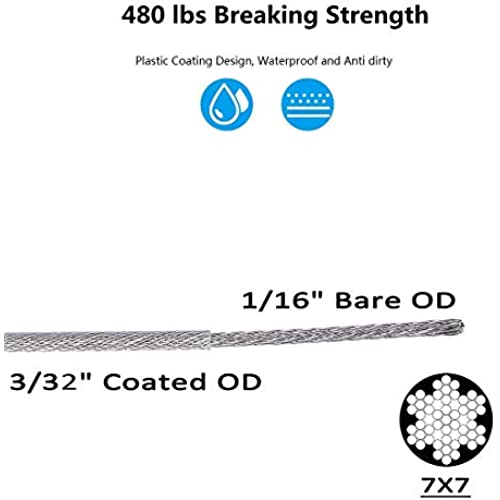
Vinyl-Coated 304 Stainless Steel CableFeatures insulation, strong weather resistance, waterproofness, rust and corrosion resistance as well as strong toughness.This outdoor light guide wire Perfect for hanging outdoor string lights. |
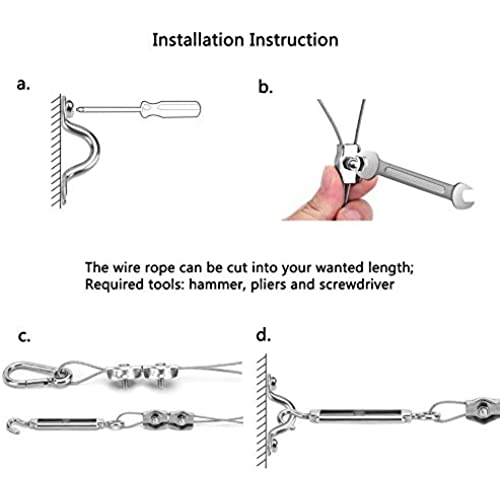
Heavy-duty 304 stainless steelThe use of the clamps makes the uninstall process very easy (+ User Guide included it). |
Easy to install and uninstallFlexible, Strong, Safe & Easy To Trim & Mount on walls and trees. |
Add best for youWe love to give it to you and hope you give it to others |


Your love for our String Lights Hanging Kit is our greatest encouragement. Thank you for your support!
|
|
|
|
|
|---|---|---|---|
|
|
|
|
|


Warm prompt:
This kit can not withstand too heavy items, please standardize the operation.
If you have any problems, please feel free Write to me!
