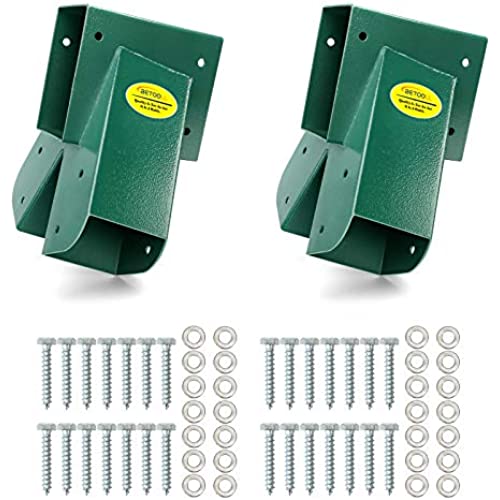

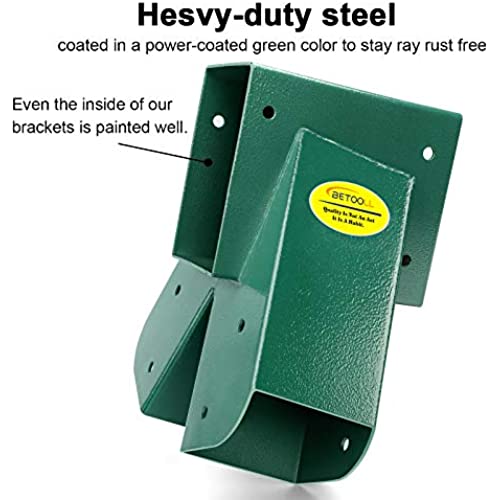
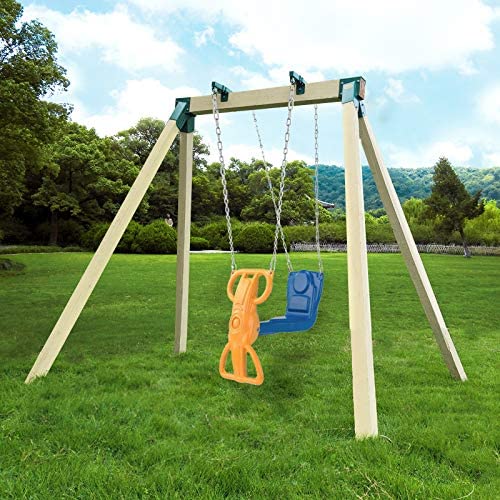
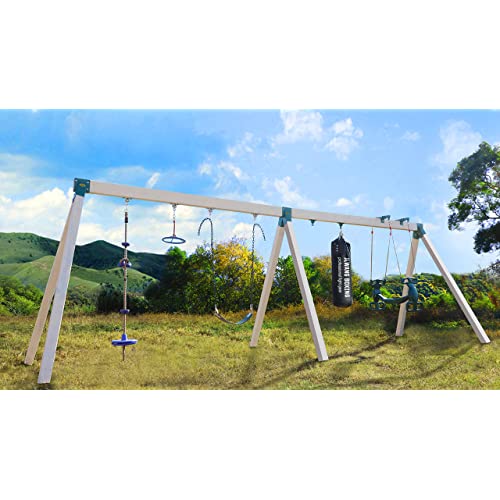


BETOOLL A-Frame 2 Brackets Swing Set Bracket with Mounting Hardware (Green)
-

Kindle Customer
Greater than one weekStraightforward instructions and easy to understand guidance
-

Philip L. Ruble
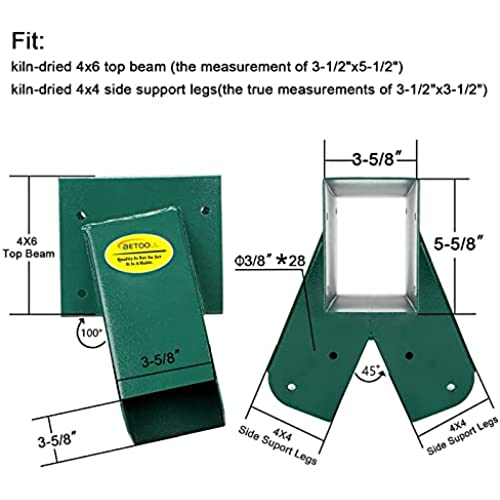
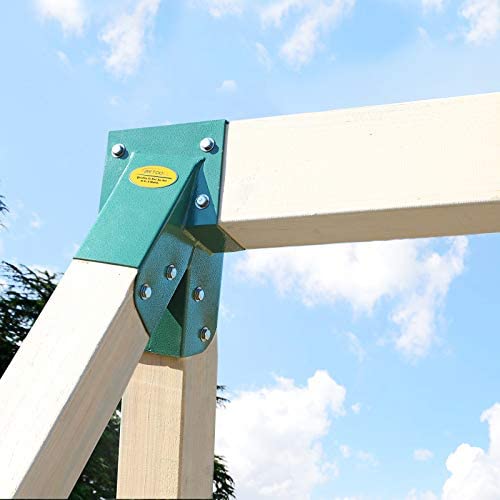
> 3 day2020 Swing set TIPS : 1. Lumber (purchase separately): pressure treated. The completed A-frame dimensions will be (up to) :12 Long x 8 Deep x 78 High. The swing set should be set up in a location with at least 6 feet of clearance in front and back. a. TOP BEAM is a 4 x 6 pressure treated beam. A single 4x6 is required. i. LENGTH of top beam - you decide. The manufacturer recommends using one kiln-dried 4x6 timber -114 (9 ½ feet) in length. Manufacturer warns that the top beam will bend and warp if it is longer than 144” (12 feet long). ii. Three swings – you may want a 132” top beam to adequately fit 3 swings safely spaced apart. (18” per swing, 16” per space between swings, 16” on each end between the outside swings and the frame, plus 7” of beam inside each bracket at each end). [ 7—16 – 18—16—18—16 – 18 – 16 –7 ] iii. Your top beam length will vary depending on what you hang from it. Examples: two swings, a porch style swing, a tire swing or a “disc” swing, a combination of different swings. You’ll need to research the recommended spacing to safely use each, cut your beam length accordingly, and decide where to place your swing hangers. Don’t forget to leave 7” on each end for the metal brackets. b. LEGS – Manufacturer recommends using four kiln-dried pressure treated 4x4 timber - 96 (8 feet long) side support legs. Longer legs are an option; however, you need to be careful not to make the frame too top heavy (tip hazard). c. CROSS BEAM - Optional cross member on each end. You can choose to add a 2x6 pressure treated cross beam across the legs on each end for extra strength. Length – you decide - The length of the cross beam will depend on how high up you place it across the legs. d. STAIN - You may want to stain your lumber prior to installation. Pressure treated lumber should be dried out prior to staining. 2. INSTALLATION: Building the frame. a. FIRST attach the brackets to 4x6 top beam. Hopefully, you will discover that your 4x6 beam fits easily into the bracket – mine did! i. Beginner TIP #1: for fitting the wood beam into the bracket. If your 4x6 beam is too tight to fit the bracket try shaving down the ends of the 4x6 top beam slightly with a plane, or a belt sander, or a chisel in order to get the bracket to fit over it. ii. Beginner TIP #2: for fitting the wood beam into the bracket. If your 4x6 beam is too tight you may want to apply ski wax and dish soap to the wood and bracket to make inserting the wood into the bracket easier. iii. Beginner TIP #3: IMPORTANT… position your 2 brackets so that the frame LEGS will flair outward on each end of the beam (and not slant toward the middle of the swing set). After fitting the beam inside the bracket, secure the brackets in place on each end of the beam by pre-drilling holes for the lag screws (included). Ratchet the lag screws into place. b. SECOND – with the beam on its back on the ground, attach SWING HANGERS (purchased separately) after carefully measuring and leaving recommended spacing between each set of swing hangers and between the outside swings and the swing set frame. You may need to research this for your unique set of swings. (The spacing for 3 swings on a 132” beam is detailed below). c. THIRD - slide the 4x4 legs into the brackets with the beam lying on its back on the ground (top down). Depending on the fit of your 4x4 legs you may need to use the tips listed earlier regarding inserting the beam into the bracket. d. NEXT, after fitting the LEGS inside the bracket, secure the brackets in place on each LEG by pre-drilling holes for the lag screws (included). Ratchet the lag screws into place. e. Optional: Finally, you may decide to add a 2x4 (or 2x6) CROSS PIECE on each end of the frame for added stability. Secure the cross piece between the legs with long exterior deck screws or lag bolts (purchased separately). 3. SPACING OF SWINGS. a. For three swings: In order to leave the recommended space between THREE swings the 4x6 beam is cut to a 132” length. (18” per swing, 16” spacing, plus 7” on each end inside the brackets). [ 7—16 – 18—16—18—16 – 18 – 16 –7 ] b. Spacing for two swings, a porch style swing, a tire swing or a “disc” swing will vary. You will need to research proper spacing for whichever type of swings you choose to install. You may decide to use a shorter top beam if you are only installing one swing, two swings, a porch style swing, or a single tire swing. Do your research before cutting the beam. 4. STAIN WOOD with a redwood stain/sealer combination. You may choose to stain the wood first before you install brackets or swing hangers. MOVING INTO POSITION & SETTING UP – This frame is heavy. Be sure to have at least two adults to roll it over and move it into position. Beginner TIP – adding cross pieces on each end of the frame not only strengthens the frame; it will give you an easier position to lift from, so that two people can more easily move the frame around. I still need to angle cut the bottom of my 4X4 legs so they will sit flat on the concrete pavers I placed under each leg. I’ve found that putting pavers under the 4x4s will prevent rotting. In addition, I am going to use a heavy gauge wire and ground anchors to hold the swing set down and prevent the frame from rocking.
-

charles sayer
> 3 dayProduct was very easy to install. Took less than 1 hour. Would definitely recommend this product to anyone.
-

Anna B.
Greater than one weekIt was more than I had expected, very well made and study, seems like commercial grade, so happy!!! You won’t be disappointed.
-

Whiskers Lee
Greater than one weekPerfect for making a quick and sturdy swing set. I did have to slightly plane the 4x6 and really pound my wood in.
-

Jamaal Grimes
> 3 dayThese swing set brackets arrived on time, the set up is easy and if you need I instructions they are provide in the box. You will need to trim a little off the 4x6 and 4x4 to get a good fit. We highly recommend this product.
-

Ride or die
> 3 dayGreat product that makes the job easier. My only complaint is the lag screws are weak but they provide enough strength to hold up to their intended purpose. Just be careful not to over torque as they will sheer.
-

roland r juarez
> 3 dayQuality good !! Color nice but. Hard to fit 2x6 tolerances are too tight!! Had hard time sliding the post in!!!!
-

L. Foster
> 3 daySo easy to make a DIY swing set with this tool!
-

makalia
> 3 dayWe used these brackets to put together an adult swing set with hammock chairs for by the fire pit for a mothers day gift. They were easy to install, directions were simple, and there wasnt a ton of tools needed. We are in the US, and the dimensions of the lumber were spot on, no sanding needed. Not sure if its different in the US than other countries, but here, our dimensional lumber isnt exact due to loosing some while being cut for manufacturing. Not sure if thats why others had an issue or not, but we did have a sander standing by just incase! We will definitely be buying more for our own swing project.
