
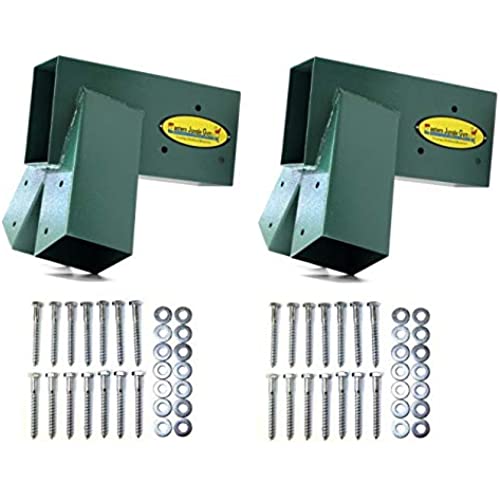
Eastern Jungle Gym Easy 1-2-3 A-Frame 2 Brackets for Swing Set with All Mounting Hardware, Green
-

CK Public
> 3 dayFits nominal sized wood better than other brands. Only issue is the lag bolts are very poor quality. They will break under moderate torque.
-
Kevin and Jessi
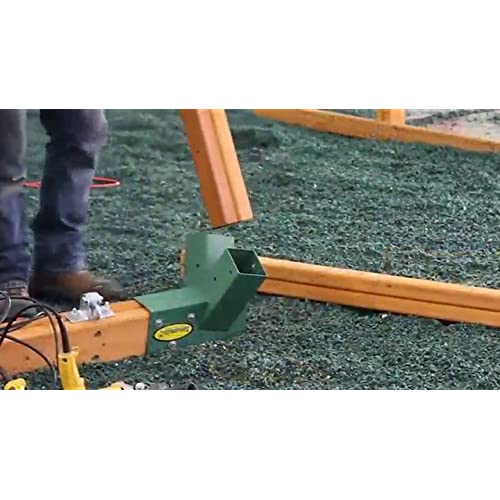
> 3 dayThe hardest part about putting this together was lifting the 4x6 onto the roof rack of my Escape to bring it home from Lowes. That and the four month wait for pressure treated lumber thanks to COVID. I used 4 8-foot 4x4 ground contact pressure treated posts for the legs and a 12-foot 4x6 pressure treated post for the top beam. The brackets fit snugly on the 4x6, almost a little too snugly on one end. A few taps with a piece of wood as a bumper block got one end flush, and I was able to easily slide the other bracket 2 feet in from the end. The instructions on Eastern Jungle Gyms website call for a 10-foot top beam, so I slid one bracket on the extra two feet and plan to tie a climbing rope on that end that stands proud. With the help of a drill and impact driver, I was able to have the frame fully assembled and upright in under and hour working entirely on my own. All of the lag bolts and washers you need are included. After pinning all four legs to the ground and hanging the swings, I gave it a test run before letting my kids on it. My 180 lbs felt secure and strongly supported, so I have no concerns about them. So far, they absolutely love it!
-
Wowed7
> 3 dayGreat product to create a A frame for swing set. So easy to install. SOLID and came with everything needed (Except the wood). Have already bought 2 of these sets and would use again. I would recommend this product. No issues
-
Brian H.
> 3 dayAs many other reviewers have noted, these brackets are very tight fitting on a 4”x6” cross beam. I took the brackets with me to a wood yard and I recommend you do the same. The yard I went to had a new bundle of 12’ 4”x6”s. I sorted through about 10 before I found 2 that the brackets would slip over both ends tightly. The other 4”x6”s would have had to be planed down 1/8”-1/4” to get the brackets to fit. The beams from the yard I was purchasing from were ‘Yellow Wood’, so that shows you what variations in dimensions you could get from a random 4”x6” from the supply store. The brackets have all of the hardware needed to affix to posts and cross beams. There were no issues with any 4”x4” posts fitting. Even though I made sure the brackets would slide over the ends of the 4”x6” cross beams, I still had to use a block of wood and hammer to get them to slide all the way on. I drove them all the way flush to the ends of the beam. If you wanted a 3’-4’ overhang, it would be difficult to get the brackets to slide that far without planing down your cross beam. I made a 24’ swing, so I used these brackets on both ends and a middle support bracket to join the 12’ Cross beams. The middle support bracket seemed to be a little larger than these brackets and went on both ends of the cross beams with relative ease. I installed hardware to hang 3 swings on each 12’ Beam. This allowed for 22” from cross beam end to the first swing and 20” center to center for each swing hanger and 20” between each swing. This is very spacious for my girls (10 and 7) and the 20” spacing also allows ample room for adults to swing. You could certainly fit 4 swings on a 12’ Beam if you needed too. With the 4”x4” posts angled out on the end brackets, you could get by with starting your first swing hanger at around 14” from the end of the beam and be fine. I used 12’ 4”x4” posts to allow the girls to swing higher. I also used a 2”x6” brace on each set of 4”x4” posts. I did not trim the ends of the posts where they join the dirt and I have not anchored my swing set. I tested it out by swinging as high as I could and this set does not move at all. I may bury 4 posts on each end of the swing set and screw the ends of the 4”x4”s too just to be safe as the girls get older and wilder. I attempted to stain and waterproof my wood before putting it up, but it was just too green to hold the stain. I’ll come back and do that in a couple of months. I did have the luxury of using a front end loader to hold the cross beam in the air while I stood the 4”x4” posts up and into the brackets. Most slid right in and tight. If they didn’t, I got on ladder and rocked the cross beam while pulling down and they easily slid the rest of the way down on the 4”x4” posts.
-
Jason Beatty
> 3 day***UPDATE*** I have changed my review from the 3 stars to 4 stars after receiving the replacement. I was able to get another good one out of the new box and after measuring one of the new ones, it was also smaller than the 3.625 they claim it to be. That being said putting the swing together was super easy and it looks great. I would highly recommend that you have a power drill though to run all of those lag bolts in because there are a lot of them! My DeWalt was nice and warm after putting it all together! We went with a 12 beam on the top and 8 legs but we are thinking of changing the legs over to 10 just to give us more room for the swing arc, assuming we dont get a letter from the HOA...so we might just hold on to the 8 as well! The thing is super sturdy but does need anchored to the ground if you are going to get crazy on it! ------------------------------------------------ I figured I would write this caution and I will for sure update this after I receive the replacement. But as you can see in this photo, the piece is not made correctly and is only 3.25 wide at the bottom and 3.625 at the top which is the measurement that they claim on their website. Since the final cut of a 4x6 is 3.5 x 5.5 if it was made correctly it would slide right on. And the second piece in this kit did just that....it slid right on without any issues at all. I have seen a lot of people saying they needed to soap up the board or push it on with a hammer, etc but being 1/4 under size is obviously a problem with the manufacturing of this piece. Amazon of course is making it right and sending me another one out and I sure hope at least one of the pieces is the correct size because we have some kids that were excited to have a swing set up and now they are learning some patience!
-
Dave Fraq
> 3 dayWent together easy and really sturdy.
-
Aaron M
Greater than one weekIf you use a 4 x 6 for the main post you will have to trim it about 1/8” to 1/4” on both sides. A planer or a table saw will work. It takes some effort but this was preferable for me because of how I affixed the swing. Running the brackets between a pair of 2 x 6 did not seem to be as sturdy but the makers state they use that method.
-
Joshua
> 3 daySuper sturdy and great coating. I definitely recommend bringing them to store when you are purchasing the wood. Wood is not all cut correctly every time so bring the bracket to confirm the wood you select fits into holes
-
Prof. Quinn Herzog IV
> 3 dayThese brackets are awesome All you need is the wood… 4x4’s and a 4x6 Very sturdy and heavy so have some friends handy A bag of bracket screws was missing and an email to the manufacturer was all it took to get a bag mailed to me Great customer service by Eastern Jungle Gym Co
-
Simple, yet complicated.
> 3 dayI had two problems. The first was just a mistake, I was sent a single bracket when I ordered the set of 2. This was resolved through an return, but I had to hassle with sending one of the brackets back. Im surprised there was not a better way to just have them send me a second bracket. I guess I should have called or chatted with Amazon rather than just creating a return. The second problem and one that other people have had from the reviews was getting the 4x6 through the end of the bracket. I bought a pressure treated 4x6x8 from Lowes to build the swing set. I was able to get both ends in the bracket, but it was very snug. I used a rubber mallet and a block of wood, the first side took quite a bit of hammering, but it went on with relatively no issues. The second side however, once the bracket was about 6 inches on I could not get it to budge with the mallet. It wasnt coming off either. I decide that the weight of the 4x6 would help me so I stood it on end, laid piece of 4x4 on the ground and repeatedly lifted and dropped the end hitting the 4x4 piece to prevent damaging the bracket or the concrete. I probably looked ridiculous, (but my kids thought I was pretty awesome haha). This worked very well until I got to the last 2 1/2 inches. At that point I hit another stopping point. Even dropping it like this would only move it millimeters. Of course at this point I realized maybe I should have done a little more prep, but the first one went on okay so I really thought I could get the second one on as well. Honestly, Im stuck right now. I want to get the 4x6 fully into the bracket, but Im trying to figure out how to do this with the last two inches. It wouldnt be that big of a deal, but I want the wood behind the full welded portion of the bracket to prevent any wear from twisting. Its probably okay honestly. Today Im going to try to get some oil through the bracket and see if that will get things moving again. So if you actually read this, take my advice and prep the end of the wood if its a snug fit (file/sand/chisel). It might seem like it will go on at first, but once you get it on, if its tight, its impossible to get off. Ill update my review if Im able to get it to work with the oil. Unfortunately with my schedule that will have to wait until closer to the weekend. Update: I was finally able to get the bracket all the way to the end of the beam. I first shot some oil into the back of the bracket and set the 4x6 up so that the end that had the oil was facing up allowing the oil to run down the seams between the 4X6 and the bracket. I then greased the remaining portion inside the bracket. I used a drill in the corners where I could see the 4x6 was rubbing against the bracket to relieve some of the pressure (but the drill bit only went so far). I waited for a few hours to let the oil settle in and then tried again. It still took an enormous amount of force, picking up and dropping the 4x6, but it started moving again. Im relieved I was able to get it to work, but yeah, this project was supposed to be easy!

