
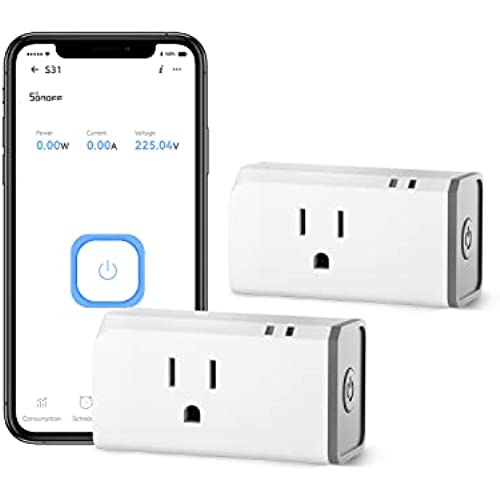


SONOFF S31 WiFi Smart Plug with Energy Monitoring, 15A Smart Outlet Socket ETL Certified, Work with Alexa & Google Home Assistant, IFTTT Supporting, 2.4 Ghz WiFi Only (2-Pack)
-

Dougboffl
Greater than one weekI bought a few Sonoff switches years back and needed more smart plugs. So as to limit my app-footprint, I ordered more Sonoff. Price is higher than other smart plugs but to keep my system with as few Chi-com manufacturers as reasonable i had to go this route. If you dont know there are 2 types. One offers live electrical useage stats and the other is basically a switch only, no data. They setup easy and work well. I never have them go off-line or die. I wish their price was about half what they are. Shipped fast.
-
Stark
> 3 day2 out of 4, S31 WiFi Smart plugs failed to stay on after 3,weeks. Trying to contact seller for replacements.
-
NJN
> 3 dayThese plugs still have the ability to work with TASMOTA. They have to be opened and flashed via serial connections. Theres a few how-tos that show the process. Flashing TASMOTA helps me avoid relying on the cloud since I use Home Assistant on a RPi3.
-
SarahJo Griggs
06-06-2025This has been our favorite smart plug for quite some time. And now being UL listed just edges it up a little higher. Two of the plugs fit fine in the same socket without forcing anything. If you want to manually flash them with Tasmota or some other open source firmware, the WiFi PCB on them is the same as it was previously so all the profiles/templates will work just fine. The product is still held together with screws and no glue so it goes back together super easy.
-
Lars
> 3 dayUsing them with Alexa, very reliable, never had a failure/need of reset. Easy setup and Alexa integration with the ewlink app. In the ewlink app you can turn on some features that Alexa do not have but still works with Alexa, additional bonus. E.g automatically turn off the device after xxx time has lapsed since power on, power on state, timers and loop timers. Very useful for my setup, controlling a water pump for my house remotely.
-
Keith Willowhawk
> 3 dayI bought this as an inexpensive way to meter how much amperage my computer desk pulled at peak load, as well as other things like AC units, coffee machines, etc. it faithfully shows amps and watts of the load. The problem is it’s a “smart” switch which you can toggle on or off, or set automated “scenes”. In addition it has “inching” auto triggers. Even with nothing defined for the automated toggles the logs still show “device triggered” or “scene triggered” at seeming random intervals, which is really inconvenient if you’re using it at the time. Latest firmware did not fix this behavior. I’d recommend only using for short duration active metering and then removing from your path.
-
Michael R
> 3 dayI love all the sonoff modules - they just work and they work really well. One of the best iot brands on the market.
-
Scott Nath
> 3 dayI chose these specifically for the history and current-usage software. And also because they allow up to 1800w of power - so I can use them to track space-heater usage! App works great and was super easy to set up. Plugs have an on/off button right on them, giving you manual control when you don’t have the app. Basically same price as comparable models, so worth it for the extra electricity capacity and the app’s UI!
-
nj28sharp
Greater than one weekPros: Flashable Affordable Easy to use Compatible with Amazon Alexa, Google Assistant, and IFTTT Power monitoring feature Cons: Too big it cover 2 gauge outlets Not as fast as some other smart plugs Does not support 5GHz Wi-Fi To flash a Sonoff S31 with Tasmota, you will need the following: A Sonoff S31 smart plug A USB to TTL adapter A micro USB cable A computer with a terminal emulator Once you have gathered your materials, follow these steps: Disconnect the Sonoff S31 from power. Open the Sonoff S31 and expose the PCB. Locate the GPIO0 button and the TX and RX pins. Connect the TX pin of the USB to TTL adapter to the RX pin of the Sonoff S31. Connect the RX pin of the USB to TTL adapter to the TX pin of the Sonoff S31. Connect the ground pin of the USB to TTL adapter to the ground pin of the Sonoff S31. Connect the 3.3V pin of the USB to TTL adapter to the 3.3V pin of the Sonoff S31. Connect the USB to TTL adapter to your computer. Open a terminal emulator and set the baud rate to 115200. Enter the following command to enter bootloader mode: Press the GPIO0 button and hold it down. While holding down the GPIO0 button, plug the Sonoff S31 into a power outlet. Release the GPIO0 button after a few seconds. The Sonoff S31 should now be in bootloader mode. Use the terminal emulator to upload the Tasmota firmware to the Sonoff S31. Once the Tasmota firmware has been uploaded, the Sonoff S31 will reboot. The Sonoff S31 will now be running Tasmota.
-
Allen Cronce
> 3 dayI bought a single S31 to replace an unreliable Fibaro Z-Wave switch. I never even bothered to use the original S31 firmware. I took it out of the box and flashed it with ESPHome under Home Assistant. Worked great the first time with no surprises. The power monitoring seems to work, but I havent bothered calibrating it. If it continues to be reliable over time, I will definitely buy more of these.


1. Download “eWeLink” on App Store for iOS or on Google Play for Android.
2. Cut off the power before installing the device. Then power it on after completing the installation.
3. After powering on, the device will enter the quick pairing mode during the first use.
4. Tap “+” to operate following the prompt on the App.
5. Input your WiFi SSID & password.
6. It will automatically search and connect the device. Name the device to complete.
SONOFF S31 Wi-Fi Smart Plug Outlet that Work with Alexa and Google Home
1. Tap "eWeLink Smart Home" on Alexa App, or "eWeLink Smart Home" on Google Home App.
2. Enter your eWeLink account and log in.
3. All the voice-controlled devices under your account display on Alexa App or Google Home App.
4. Name the devices to complete.
5. Now, control the connected devices with your voice.
“Alexa, turn on the light.”
“Hey Google, turn off the bedroom light.”
......
- Only eWeLink advanced users have access to IFTTT, Costs 9.9USD and you will enjoy a full year of the privilege.


Alexa Energy Dashboard - Save on Energy Usage.
To make our homes more efficient and sustainable, Alexa officially releases the new energy dashboard that allows you to track, manage and save energy usage of SONOFF devices through Alexa app. SONOFF S31 support this new feature.
|
|
|
|
|---|---|---|
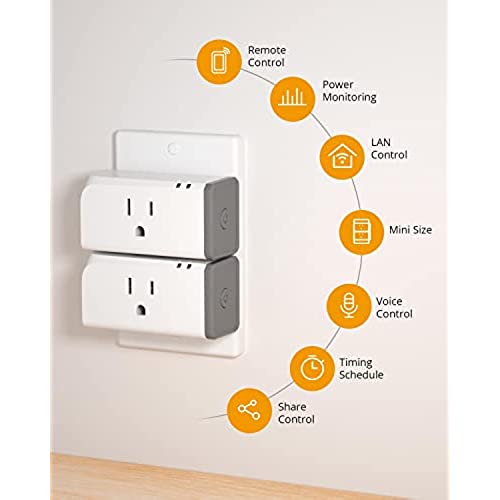
APP ControlWant to remotely control those ordinary devices like heater, lamps and other devices? The smart plug is your ideal option. Plug and play, then you can turn ON/OFF them instantly just with a light touch on eWeLink App anytime and anywhere. |
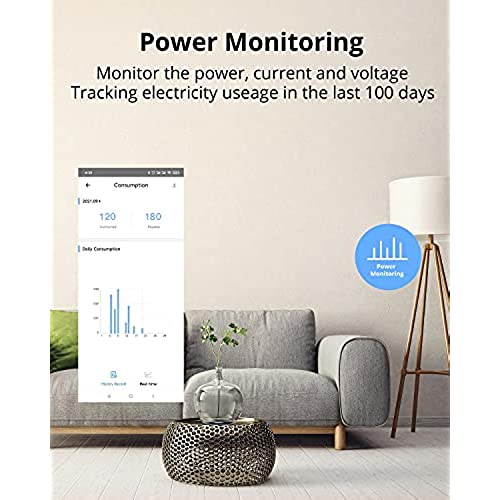
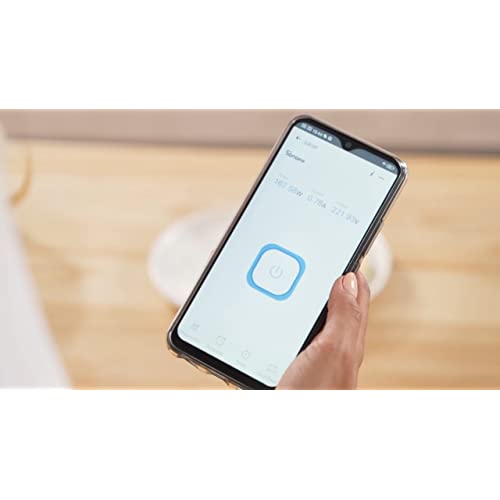
Energy MonitoringMonitor the power, current and voltage. Tracking electricity useage in the last 100 days. |
Timing ScheduleCreate schedule to turn the plug on and off at specific time. |


|
|
|
|
|---|---|---|
LAN ControlWhen the router is not connected to the Wi-Fi network, you can still control the device through the App under the LAN Control mode. Note: Your phone and device must be connected to the same router. |
Compatible with IFTTTBy connecting with "eWeLink Smart Home" on IFTTT App, you own unlimited possibilities to control SONOFF devices with IFTTT supported App and services. (Only eWeLink advanced users have access to IFTTT, Costs 9.9USD and you will enjoy a full year of the privilege.) |
Share DevicesYou can simply share home appliances to your family via App so that they can also turn on/off the devices remotely. Its easy control feature also make the elders or children enjoy smart life without difficulty. |


SONOFF Smart Home
