
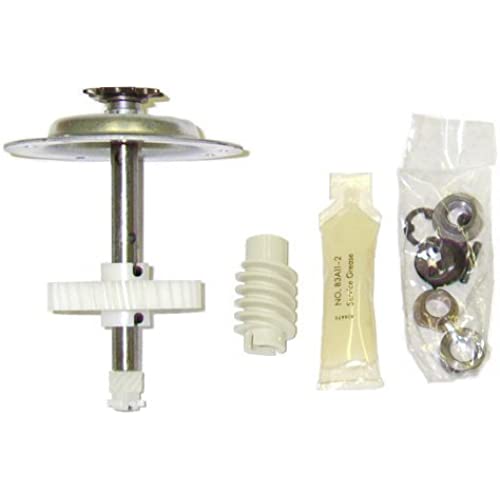
Liftmaster 41c4220a Gear and Sprocket Kit for Chamberlain, Sears, Craftsman and LiftMaster 1/3 and 1/2 HP Chain Drive Models
-

hickchick67
> 3 dayJust what was needed to repair broken garage door opener. The gears had stripped out and these were the replacement pieces needed. Got this due to several reviews saying it was easier to get this kit with the gear already on the sprocket. Unfortunately, the sprocket was the wrong size and we had to remove the new gear from new sprocket and put it on the old sprocket. We could have a few $$ by ordering just the gear replacement kit. But no way to know that until you get into it. It worked and now the garage door opener is much more quiet than ever before. Much more economical than paying for a professional and/or replacing the opener. If anything would happen again, now we know to just get the gear kit.
-
Ocatominete on youtube
> 3 dayShipping was on time. I replaced only the sprocket shaft. The other gears were ok. To replace the other gears was more effort than I wanted to go through. I didnt want to spend any more time on a ladder than I had to. I looked at youtube videos of the process and that helped a lot. I have 2 garage doors, so have 2 openers. The reason I replaced the parts is the shaft on one opener was ground through due to shaft bearing wear. That is, the bearing wore out and the shaft then bore against the bearing hold plate until the shaft wore through. Of course I discovered this by watching the sprocket fall off the motor housing one day. I looked at the other opener motor shaft and found it was on its way to grinding through also. These openers have a date of 2006 on them. The first shaft replacement took about 20 minutes, the second about the same. One video suggested threading the bearing plate holes in advance of shaft installation in the motor housing and this is smart. One bearing plate hole is in a position such that the bolt is difficult to reach so that threading the self-tapping bolt in would be really hard. Another video tip is to position the door in the closed position. I did and I didnt need to adjust anything after shaft replacement. All in all, an economical and quick repair. The savings over buying a new opener and the time to replace it all when just replacing the damaged parts in place was tremendous.
-
David J
> 3 dayPerfect fit, took about an hour and a half to install as it was first time I ever had to rebuild the opener. Garage door is as good as new.
-
chris
> 3 dayEasy to install, been in place for a few months with no trouble.
-
Thomas B. Campuzano
> 3 dayEasy application, quality parts.
-
Mike Seavy
> 3 daySaved lots of $$$. Was relatively easy to install.
-
DjGarE
> 3 dayDirect fit for my liftmaster. Works just fine.
-
Lynne B
Greater than one weekThis product was received quickly which was important since we couldnt use our garage. It came with detailed instructions that made it easy for a DIY install and were back up and the door is purring again!
-
Ms. Tamara Gislason PhD
> 3 dayCome quick and work perfect.
-
Royster
> 3 dayI am glad I purchased the KIT even though I only needed the gear. Not having to punch out the gear roll pins and having a fresh bearing at the sprocket end made things smoother for me and the opener. The new bearing rolls a lot smoother than my old one and likely put some extra smoothness in the operation. I also lubed the chain and rollers to ensure nothing was binding. The door felt slightly heavy, a possible cause for gear destruction, but I did not want to adjust (tighten) the very old springs for safety reasons. My door travels smoothly now rather than previously very bouncy and then not at all. You will likely have to adjust your travel limit settings since removing the shaft can rotate the travel switches gear a tooth or two or more if you spin the gear. You need some mechanical understanding to replace these parts nd YouTube could help in that department.


